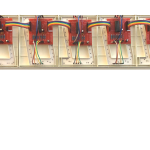
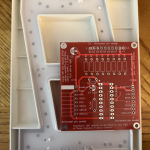
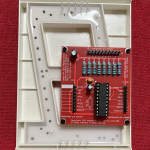
As part of a collaboration project through contact with a member of Instructables who had seem my large LED clock project I made some serial driver boards for his project adapted from mine which uses 4″ high LED displays and uses the decimal points as the colons with alternate digits inverted. These driver boards are daisy chainable and can be used for driving any large, multi LED chip 7 segment displays. A TPIC6B595 serial shift register is on each PCB with the aim that the boards can be mounted behind or to the displays. Control can be from an Arduino, Raspberry Pi, ESP32 etc.

I will be selling these boards on eBay and / or Tindie if you wanted to purchase some for your own projects. Please see the links on the right for my eBay store where you can purchase a blank, unpopulated PCB.
The PCB is basically a breakout board for the TPIC6B595 and has provision for current limiting resistors on the LED segments. As the TPIC6B595 is a sink driver, these boards can only be used with Common Anode displays. They are daisy chained by simply plugging them together. There is a 10K pullup resistor attached to the SRCLR pin which in most cases can be left as-is and not connected to the microcontroller as the SPI libraries do not use this pin. It is broken out onto the input and output connectors if the user wishes to use it. The 10K resistor should only be fitted to one board if daisy chained.
Filter & smoothing capacitors are fitted to each PCB with a 0.1uF and 10uF capacitor on the 5V rail and a 33uF capacitor on the LED anode supply, which in most cases 12V is fine. The 4″ LED modules used in Rick’s project have 5 LED chips per segment and one for the decimal point so 330ohm resistors for the segments and 1.2K for the decimal point is required for a forward current of around 8mA. With his displays this gives a very bright display – in fact too bright. With my firmware the brightness can be controlled by using PWM on the Output Enable pin.
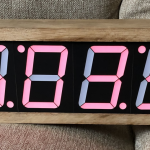
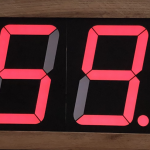
An example of what can be built with these modules (credit to Rick Gast)

Code for Rick’s clock as per images above
Code for clock shown in Rick’s demo above
Videos
Demo video of the driver board
Rick’s Clock demo
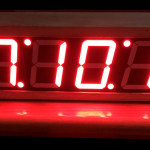
My clock for reference